
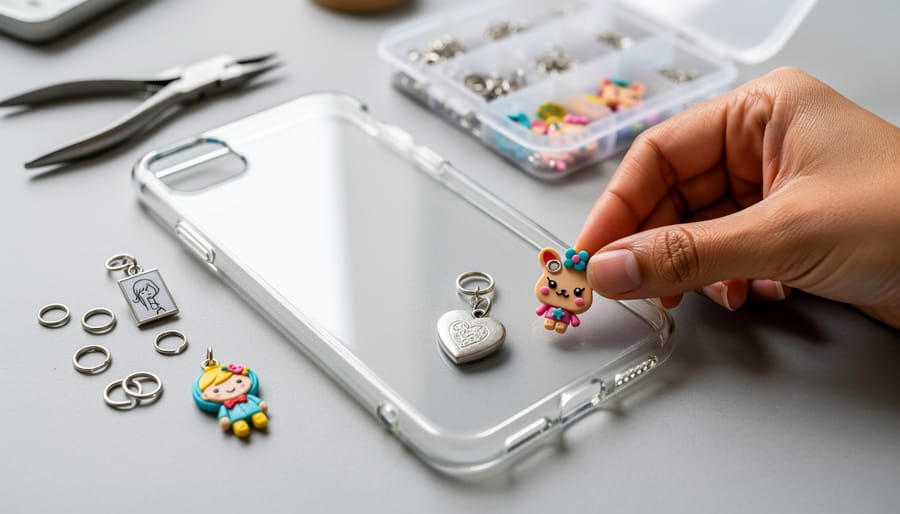
How to Make a DIY Phone Case with Charms in 7 Easy Steps
You can transform a plain phone case into a one-of-a-kind accessory by attaching decorative charms using jump rings, adhesive, or pre-made charm slots. This straightforward customization takes about 30 minutes and requires minimal supplies: a clear or solid-colored case, charms that reflect your personality, and basic jewelry findings. The result? A DIY phone case that tells your story every time you pull out your phone.
The beauty of charm decoration lies in its flexibility. You can swap charms seasonally, add tiny mementos from travels, or create themed collections that match your style evolution. Crafters have been personalizing phone cases since smartphones became everyday essentials, but the charm trend has exploded recently as people seek tactile, meaningful ways to stand out in a sea of identical devices.
Whether you’re drawn to vintage locket charms, miniature enamel pins, or polymer clay creations you’ve made yourself, this project welcomes beginners and experienced makers alike. The process respects both quick assembly methods and more intricate techniques like resin embedding or drilling. What matters most is choosing charms that make you smile every time you see them, because your phone case should feel like a tiny gallery of things you love.
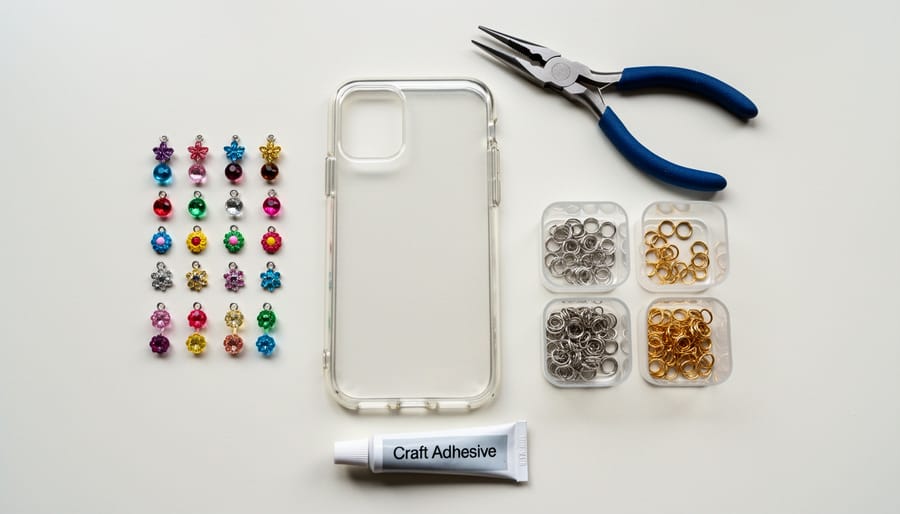
What You’ll Need to Get Started
Choosing the Right Base Case
Your base case is the foundation of your charm project, so picking the right one matters. Clear cases work beautifully because they showcase your phone’s original color while letting charms take center stage. Hard plastic cases offer the sturdiest surface for adhesive bonds, epoxy and strong glues grip them well, and they won’t flex enough to pop charms loose over time.
Silicone cases feel softer and absorb drops better, but they present a challenge: their flexible, slightly oily surface makes it harder for adhesives to stick permanently. If you love the cushioned protection of silicone, rough up the attachment spots with fine sandpaper first, then clean thoroughly with rubbing alcohol before gluing.
Match your case to your phone model exactly. A case that fits loosely will shift around, stressing charm attachment points until they fail. Check that charm placement won’t block your camera lens, charging port, or volume buttons, test by holding charms against the case before committing.
Think about how you’ll personalize it: a flat-backed case gives you maximum surface area for glued charms, while cases with textured patterns or built-in grips limit where you can attach pieces securely.
Selecting Your Charms
Your charm selection sets the tone for the entire case. Start by gathering pieces that genuinely speak to you, maybe a tiny book for readers, a miniature camera for photographers, or letter charms that spell something meaningful. Don’t overthink matching everything perfectly; eclectic combinations often create the most interesting designs.
Weight matters more than you’d expect. Heavy metal charms work beautifully as one or two statement pieces, but loading up the case with bulky items makes it awkward to hold and risks loosening adhesive over time. Balance substantial charms with lightweight resin or acrylic alternatives.
Mixing eras creates depth. Pair vintage brass lockets from antique shops with sleek, contemporary American-made charms from independent artisans. Hunt through thrift store jewelry boxes for unique finds, then contrast them with fresh designs from craft markets. The blend of old and new tells a richer story than sticking to a single aesthetic.
Consider practical placement too. Avoid positioning large charms near the camera lens or charging port, and test how the case feels in your hand before committing to your layout.
Safety and Preparation Tips
Before you dive into creating your charm phone case, take a few minutes to set up safely. Working with adhesives and small tools requires some basic precautions to protect both you and your phone.
Cover your work surface with newspaper, a silicone mat, or wax paper before you start. Adhesives can seep through thin materials and damage furniture. Keep paper towels and rubbing alcohol nearby for quick cleanup of any spills or excess glue on your fingers.
Remove your phone from the case completely while you work. Never apply adhesives or drill holes with your device still inside. Even a small slip can cause costly damage to your phone’s screen, camera, or ports.
Test your materials first on a hidden spot or scrap piece. Apply a small amount of your chosen adhesive to the inside edge of the case and let it cure fully. This quick test reveals whether the glue will discolor clear plastic, create a cloudy finish, or weaken silicone materials. Similarly, try your heaviest charm on a test area to confirm it will hold securely.
If you’re drilling holes for jump rings, use a hand drill or rotary tool at low speed. Mark your spots with a pencil first and start with a smaller bit than you think you need. You can always make the hole larger, but you can’t undo an oversized opening.
Wear old clothes or an apron. Craft adhesives rarely wash out completely once they set.
Creating Your Charm Phone Case: Step-by-Step
Step 1: Clean and Prepare Your Case
Remove your phone from the case and wipe down the entire surface with rubbing alcohol on a lint-free cloth or microfiber towel. This removes oils, fingerprints, and dust that prevent adhesives from bonding properly. Pay extra attention to corners and edges where grime accumulates. If your case has a textured surface, use a soft-bristled toothbrush dipped in isopropyl alcohol to reach into grooves. Let the case air-dry completely for at least five minutes before moving forward. A clean surface is crucial whether you’re following specific phone case ideas or creating your own design. Never use oil-based cleaners or moisturizing wipes, as they leave residue that weakens adhesive bonds.
Step 2: Plan Your Design Layout
Before you commit charms to adhesive, lay everything out on your clean case to visualize the final result. Arrange charms multiple times until you’re happy with the composition. Consider functionality, keep the camera lens, charging port, and side buttons completely clear. Balance heavier charms across the case rather than clustering them on one side, which can make your phone feel lopsided. Take a photo of your preferred layout for reference during assembly. Test how the case feels in your hand with charms placed in different positions. If you’re mixing sizes, try placing larger statement pieces as focal points with smaller charms filling in around them, or cluster similar charms for a cohesive look.
Step 3: Attach Anchor Points or Jump Rings
Now you’ll create the foundation for dangling charms by establishing secure anchor points on your case. The most reliable method involves small adhesive loops or pre-made charm loops designed for phone cases, which you simply press firmly onto the top or bottom edge. Position them where they won’t interfere with your camera or charging port.
If your case material allows, tiny self-adhesive eyelets offer another option, press them through the case edge and fold the backing tabs flat inside. Avoid drilling unless you’re experienced, as it can crack hard cases or create rough edges that damage your phone. Test each anchor point by gently tugging before attaching expensive charms. Most adhesive loops need 24 hours to cure fully, so resist the urge to add charms immediately.
Step 4: Apply Adhesive to Direct-Mount Charms
Choose the right amount of adhesive for each charm, too little won’t hold, but too much creates messy overflow. For small, lightweight charms, a single small dot in the center works best. Larger charms need three to four tiny dots spread evenly across the back surface.
Apply adhesive to the charm rather than the case. This gives you better control and prevents excess glue from spreading where you don’t want it. Work with one charm at a time so the adhesive doesn’t start setting before you position it.
If you’re using E6000 or similar strong adhesives, apply them in a well-ventilated area and use a toothpick for precise placement. For hot glue, keep the glue gun on its lowest setting to avoid melting plastic cases or damaging delicate charms.
Step 5: Position and Secure Your Charms
Working deliberately and carefully is crucial at this stage, you’ve prepped your case and applied adhesive, so now it’s time to commit to your design. Pick up each charm with clean, dry fingers or tweezers to avoid transferring oils that could weaken the bond. Place it exactly where you planned, then press down firmly for 15-30 seconds. Don’t slide or reposition once you’ve made contact, as this breaks the adhesive seal. For flat-backed charms, apply pressure across the entire surface using your thumb or a clean cloth. Heavier pieces need extra attention, hold them steady for a full minute. Work methodically through your design, securing one charm completely before moving to the next.
Step 6: Add Jump Rings and Hanging Charms
Now comes the fun part, adding your dangling charms. Hold a jump ring with two pairs of pliers, gripping each side of the split. Twist one side toward you and the other away to open the ring sideways (never pull apart, which weakens the metal). Slide your charm onto the open ring, then thread it through the hole or attachment point you created in your case. Close the jump ring by reversing the twisting motion until the ends meet flush with no gap.
For multiple charms at one point, connect them in a chain before attaching to the case, this creates lovely cascading movement. Make sure each jump ring closes completely; even a tiny gap will let charms slip off with daily use.
Step 7: Allow Proper Curing Time
After carefully positioning all your charms, resist the temptation to immediately snap the case onto your phone. Proper curing time ensures those decorative elements stay put through daily use.
Most craft adhesives need 24 hours to reach full strength, though some fast-setting epoxies cure in 4-6 hours. Check your specific adhesive’s packaging for exact timing. Place your finished case on a flat, stable surface away from curious pets or children who might disturb it. Avoid high-traffic areas where it could get knocked over.
Set the case in a well-ventilated spot out of direct sunlight, which can sometimes affect adhesive properties or fade certain charm finishes. If you’ve used jump rings and dangling charms, position the case so these hang freely rather than pressing against the work surface.
Consider propping the case at a slight angle using a clean cloth or foam block if you’ve attached particularly heavy charms, preventing them from sliding during the curing process. Mark your calendar with the completion time so you don’t cut the waiting period short. Patience now prevents the frustration of reattaching fallen charms later.
Testing and Troubleshooting Your Finished Case
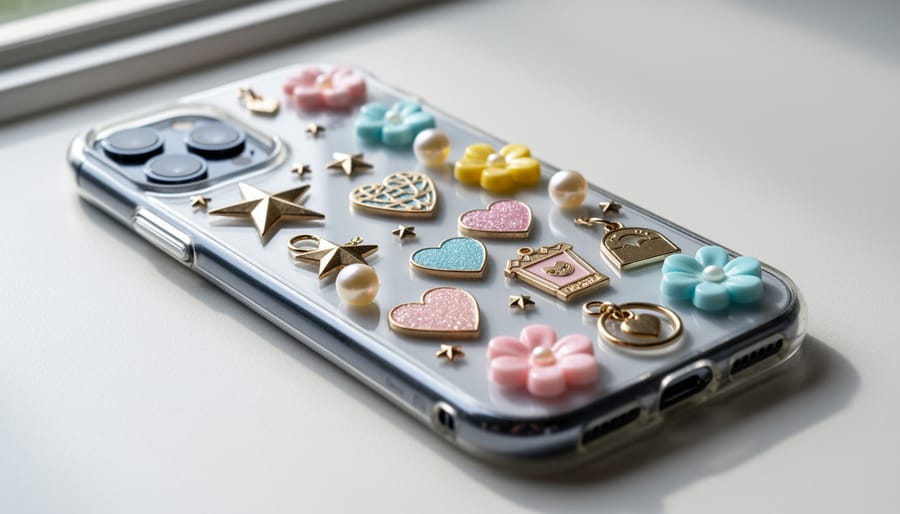
After all your careful work, testing ensures your charm phone case holds up to daily use. Start by gently tugging each charm to check the bond, they should feel firmly attached, not wobbly or loose. Pay special attention to heavier charms or those positioned near the case edges where stress is greatest.
Next, insert your phone into the case and test all the functionality. Press each button to confirm the charms don’t interfere with volume controls, power buttons, or side switches. Check that your charging port remains fully accessible and that the camera lens area is clear. If you use wireless charging, place your phone on the charger to verify the charms’ metal components don’t block the connection.
Walk around with the case for a few hours, slipping it in and out of your pocket or bag. This real-world testing reveals issues that might not be obvious on a workbench. Listen for rattling sounds that could indicate a charm working loose.
Common issues have straightforward fixes. Charms catching on fabric usually means they extend too far from the case edge, consider repositioning them toward the center. Uneven surfaces where glued charms create bumps can be smoothed by sanding the charm’s back before reattaching, or switching to flatter charm styles. If jump rings snag constantly, try smaller rings or reposition dangling charms to less vulnerable spots.
For charms that pop off despite proper curing time, the culprit is often oils or residue on the case surface. Strip everything off, clean with rubbing alcohol, let it dry completely, then reapply.
Creative Design Ideas and Artist Inspiration
Your charm phone case can reflect any aesthetic you love. For a minimalist approach, limit yourself to two or three carefully chosen charms in coordinating metals, think a single initial charm, a small gemstone bead, and a delicate star. This restrained style works beautifully with clear or neutral cases and keeps the focus on quality over quantity.
Maximalist designs embrace abundance. Layer charms across the entire back of your case, mixing sizes, colors, and themes until you create a personal gallery. One crafter combines vintage cameos with resin flowers, miniature books, and brass gears for a Victorian curiosity cabinet effect. The key is finding visual balance even in complexity, group similar colors together or create intentional clusters rather than random scatter.
Themed collections tell a story. Travel enthusiasts might gather charms from each destination: an Eiffel Tower from Paris, a tiny gondola from Venice, coordinates engraved with meaningful locations. Music lovers can attach miniature instruments, vinyl records, and musical note charms. Pet parents often create tribute cases featuring their animal’s breed charm, a paw print, and tags with pet names.
Vintage-inspired cases tap into nostalgia. Scour antique shops and estate sales for genuine vintage charms from the 1960s and 70s, these carry unique patina and craftsmanship modern pieces sometimes lack. Mix them with handmade artisan charms from Etsy creators who specialize in retro aesthetics.
Seasonal swapping keeps your case fresh. Create interchangeable sets: autumn leaves and pumpkins, winter snowflakes, spring butterflies, summer shells. Some crafters maintain a charm library and redesign their cases monthly.
Meet Sarah, who started making charm cases as gifts for friends in 2024. When recipients kept asking for custom versions, she launched an Etsy shop. She now sources unique handmade charms from fellow artisans and takes commissions for personalized cases, turning her creative hobby into steady income by focusing on storytelling, each case she makes captures the customer’s passions in wearable art.
Caring for Your Charm Phone Case
Caring for your charm phone case properly extends its life and keeps your design looking polished. Clean the case weekly with a soft, slightly damp microfiber cloth, avoid harsh chemicals that might weaken adhesive bonds or damage charm finishes. For stubborn smudges, use a drop of gentle dish soap mixed with water, then dry immediately.
Check your charms monthly for any loosening. Gently tug each one to test security. If you notice movement, remove the charm, clean both surfaces with rubbing alcohol, and reapply a small amount of E6000 or your original adhesive. Let it cure completely before use.
Seasonal charm swaps keep your case fresh. Carefully warm stubborn adhesive with a hair dryer on low heat for 15-20 seconds to soften the bond, then gently twist and pull. Remove any residue with adhesive remover or rubbing alcohol before attaching new charms.
Store your phone case-down to prevent charm snagging. If charms dangle, consider removing the case during high-impact activities, even secure attachments can catch on fabric or loosen with repeated stress. Regular maintenance takes minutes but prevents losing favorite pieces.
Turning Your Hobby Into Income
Once you’ve mastered charm phone case creation, you might discover a genuine market for your handmade designs. Custom phone cases sell particularly well because people constantly search for accessories that reflect their personality, and mass-produced options rarely capture individual style.
Start by testing demand through established online marketplaces like Etsy, where handmade craft enthusiasts actively browse for unique items. Create listings that showcase different styles, maybe a minimalist floral design, a bold maximalist piece, and a seasonal theme, to see what resonates with buyers. High-quality photos showing your cases from multiple angles, including close-ups of charm details, make the difference between scrolling past and adding to cart.
Custom orders often command higher prices than ready-made pieces. Offer personalization options: customers choose their color scheme, select specific charm themes like travel or astrology, or provide their own meaningful charms to incorporate. This service attracts buyers celebrating milestones or seeking thoughtful gifts.
Pricing requires honest math. Calculate your material costs per case, then add fair compensation for your time. Don’t undervalue skilled handwork. A well-crafted charm phone case typically sells between $25 and $60, depending on complexity and charm quality. Vintage or collectible charms justify premium pricing.
Building a sustainable craft business means consistent quality and reliable customer communication. Ship carefully with protective packaging, respond promptly to questions, and consider offering care instructions with each purchase. Your customers aren’t just buying phone cases, they’re investing in wearable art that tells their story.
Frequently Asked Questions
Charm phone case crafting raises practical questions, especially for first-timers worried about durability or compatibility with everyday phone use. Below are answers to the most common concerns.
What’s the best adhesive for attaching charms to a phone case?
E6000 craft adhesive and two-part epoxy resin provide the strongest bonds for lightweight to medium charms. For heavier metal charms or items subject to frequent handling, epoxy offers superior hold and impact resistance.
How much charm weight can a phone case handle?
Most cases comfortably support 20-30 grams of total charm weight without affecting phone balance or case integrity. Distribute heavier charms evenly and avoid clustering all weight on one edge to prevent case warping.
Will my charm phone case work with wireless charging?
Cases with flat-backed charms under 3mm thick typically work fine, but dangling charms or thick embellishments may prevent proper contact with charging pads. Test your finished case on your charger before committing to a final design.
Where can I find unique charms for my phone case?
Check craft supply stores like Michaels and Joann for affordable options, browse Etsy for handmade artisan charms, or hunt through vintage shops and estate sales for one-of-a-kind collectible pieces. Jewelry-making supply websites also stock diverse charm collections.
Can I remove and replace charms later?
Charms attached with jump rings are easily swappable, but those glued directly require careful prying with a craft knife and may damage the case surface. Plan your permanent attachments carefully or use removable methods for designs you want to change seasonally.
How do I prevent charms from scratching my phone screen?
Keep charms positioned on the back and sides of the case, at least 5mm away from any edges that could contact the screen when the phone is face-down. Avoid sharp-edged metal charms near vulnerable areas.
These questions cover the technical concerns that trip up most beginners. Addressing adhesive strength early prevents frustration with charms falling off after a week of use, while the wireless charging question saves crafters from creating beautiful cases they can’t actually use with their charging setup. Weight distribution matters more than most people expect, an unbalanced case feels awkward in your hand and can even interfere with taking photos or pressing side buttons.
The charm sourcing question opens creative doors. Mixing a vintage enamel pin from a thrift store with resin charms from an Etsy artisan creates far more interesting results than buying a matched set from a single craft store. Your phone case becomes a tiny curated collection rather than a predictable craft project.
Key Takeaways
Making your own charm phone case comes down to gathering the right materials, following safety guidelines, and working through seven straightforward steps. You’ll need a clear or solid base case, charms that speak to your style, strong adhesive like E6000 or epoxy resin, and jump rings with pliers if you want dangling elements. Always work in a ventilated space and protect your surface from adhesive spills.
The process itself is manageable: clean your case thoroughly, plan your layout before committing, attach anchor points for hanging charms, glue down stationary pieces, add your dangling charms with jump rings, and give everything at least 24 hours to cure completely. Don’t rush that final curing step, it’s what keeps your charms secure through daily wear.
The beauty of this craft is that there’s no single right way to do it. Some people love a minimalist look with two or three carefully chosen vintage charms, while others create maximalist masterpieces packed with color and personality. Mix metals, combine themes, swap out charms seasonally, whatever feels authentic to you. Your phone case should tell your story, not follow someone else’s rules. Start with what you have, experiment fearlessly, and enjoy the process of making something that’s entirely yours.
You’ve made it through every step, and now you’re holding a phone case that’s completely yours, one that tells your story through the charms you chose and arranged. That’s the real magic of DIY: you end up with something nobody else has, something that makes you smile every time you pick up your phone.
If you loved this project, don’t stop here. Your creative momentum is already building. Try experimenting with different themes next time, maybe a travel-inspired case with tiny globes and compasses, or a nature theme using leaf charms and pressed flowers under resin. Each case you create sharpens your skills and deepens your understanding of what works.
The handmade craft community is full of people who share your passion for making things by hand. Dive into more DIY techniques and discover new ways to customize your accessories. Share photos of your finished cases, swap charm-sourcing tips, and learn from other crafters who’ve turned this hobby into something bigger.
Your first charm phone case won’t be your last. Start your next one today.