
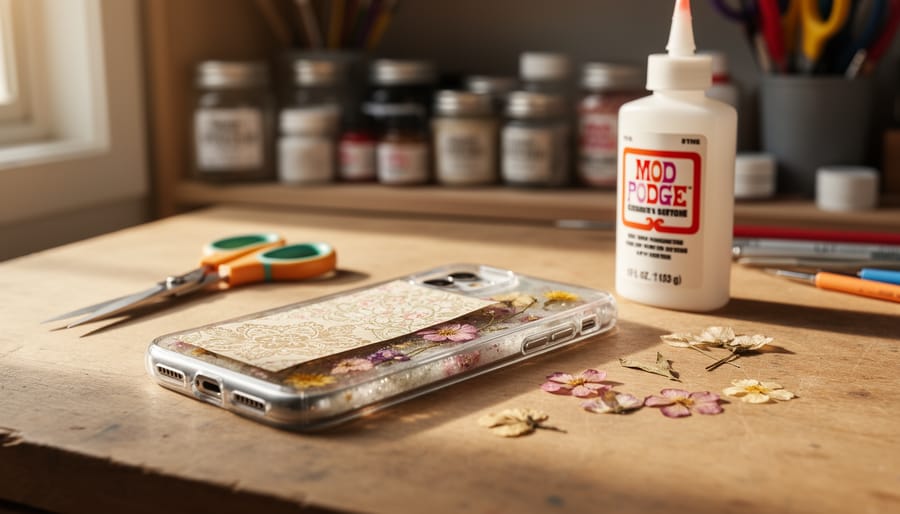
How to Make a DIY Phone Case That’s Uniquely Yours
You can make a custom phone case at home in under an hour using materials you likely already have: clear cases, fabric, paper, resin, or heat-moldable plastic. The simplest method starts with a transparent case and decorative paper or fabric, secured with mod podge or clear adhesive. More advanced techniques like resin casting or heat molding offer durability comparable to store-bought options, and the entire process costs between three and fifteen dollars depending on your chosen method.
Creating your own phone case isn’t just about saving money. It’s about carrying something that genuinely represents you, something no one else in the world has. I’ve watched crafters turn this simple skill into thriving side businesses, selling custom cases at local markets and online. One maker I know started experimenting with pressed flowers and resin in her kitchen and now fills orders faster than she can make them.
The beauty of DIY phone cases lies in their accessibility. Whether you’re working with basic craft supplies or investing in specialty materials, each technique adapts to your comfort level. A beginner can create a stunning fabric-backed case in twenty minutes. Someone ready for a challenge can master resin work that rivals professional designs.
This guide walks you through four proven methods, from the simplest paper insert technique to heat-molded custom fits. You’ll get complete materials lists for each approach, step-by-step instructions that actually work, and the safety guidance that keeps your workspace hazard-free. By the end, you’ll have both a protected phone and a new skill worth sharing.
Why Craft Your Own Phone Case?
Crafting your own phone case transforms a purely functional item into a personal statement that reflects who you are. Mass-produced cases rarely capture your exact style, but when you make one yourself, you control every detail, from color schemes and patterns to textures and embellishments. It’s the difference between wearing someone else’s design and wearing your own vision.
The financial appeal shouldn’t be overlooked either. Premium phone cases often cost $30 to $60, while DIY versions typically run $5 to $15 in materials. You’re not just saving money on one case; you’re gaining the skills to create as many as you want. Change your case with your mood, the season, or your outfit without breaking the bank.
Sustainability adds another dimension to the appeal. Instead of discarding old cases, you can refresh them with new designs. Fabric scraps, vintage buttons, dried flowers from your garden, even pages from damaged books, materials that might otherwise end up in landfills become elements of your wearable art. You’re participating in the slow craft movement, choosing quality and meaning over disposable consumption.
Perhaps most rewarding is the confidence that comes from making something useful with your own hands. Sarah Chen discovered this when she started decorating clear cases with pressed botanicals for friends in 2024. What began as gifts evolved into a small business when she listed her cases on Elephant In The Room. Within six months, she’d sold over 200 cases and connected with customers who appreciated the care behind handmade goods. Her story isn’t unique, countless crafters have found that phone case making bridges the gap between creative hobby and meaningful income, all while carrying a daily reminder of their own capability.
What You’ll Need: Materials and Tools
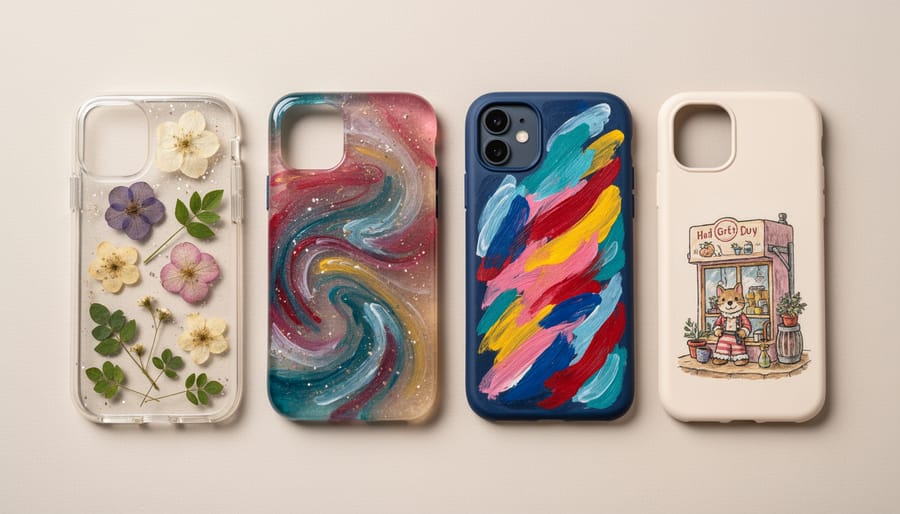
Choosing Your Base Case
The foundation of your DIY phone case starts with choosing the right blank. Not all base cases work equally well for every technique, and selecting the wrong one can lead to frustration after you’ve invested time decorating.
Clear cases are ideal if you’re planning to showcase pressed flowers, printed designs, or photos, anything you want visible from the back. They’re typically made from TPU (thermoplastic polyurethane), which is flexible enough to snap on and off easily. Look for cases with a completely flat interior surface rather than textured patterns that might show through your design.
Silicone cases work beautifully for fabric covering and paint techniques because their slightly grippy surface helps adhesives bond securely. They’re forgiving for beginners since minor imperfections blend into the soft material. The downside? Resin doesn’t cure properly on silicone, so skip this base if you’re planning a resin project.
Hard plastic shells are your best choice for resin work and intricate painting. They provide a stable, non-porous surface that accepts most adhesives and sealants. These snap-on cases come in matte or glossy finishes, choose matte for better paint adhesion.
Whatever style you choose, verify it fits your exact phone model by checking the product listing carefully.
Safety and Preparation Tips
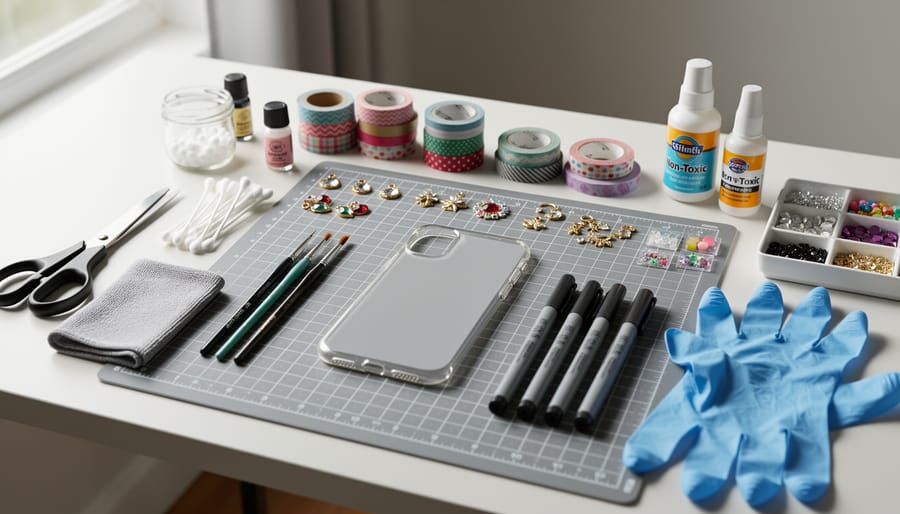
Before you start crafting, set yourself up for success by creating a safe workspace. Resin, strong adhesives, and spray sealants release fumes that can cause headaches or dizziness, so work in a well-ventilated area, near an open window or outdoors is ideal. If you’re working with epoxy resin or spray products, consider wearing a respirator mask rated for organic vapors, not just a dust mask.
Cover your work surface with newspaper, a silicone mat, or wax paper to protect it from drips and spills. Adhesives and resins can permanently damage furniture, so this step isn’t optional. Wear disposable gloves when handling resin, super glue, or any strong adhesive, and keep paper towels handy for quick cleanup.
Protect your phone during the crafting process by wrapping it in plastic wrap or placing it in a sacrificial case before test-fitting your decorated case. This prevents accidental glue smears, paint drips, or resin spills from damaging your device. Remove your phone completely before applying any wet materials.
Plan ahead for curing and drying times. Resin projects need 24 to 72 hours to fully cure in a dust-free spot where they won’t be disturbed. Paint and adhesive projects require several hours of drying time, rushing this step leads to smudges, fingerprints, and ruined designs. Set up a dedicated drying area away from pets, children, and household traffic before you begin.
Step-by-Step: Four DIY Phone Case Techniques
Method 1: Clear Case Decoration (Easiest for Beginners)
Clear case decoration is the perfect starting point because it requires no specialized skills and minimal tools, just a clear case, your chosen decorative materials, and a few minutes of careful assembly. The beauty of this method is that your design sits protected between the phone and the case, so it won’t fade, peel, or wear away with daily use.
Start by gathering your decorative materials. Pressed flowers and leaves work beautifully for a botanical look, while printed designs let you feature artwork, quotes, or photos. You can also use decorative paper, washi tape strips arranged in patterns, or even fabric scraps for texture. Whatever you choose, make sure it’s thin and flat, bulky materials will prevent the case from fitting properly and may interfere with buttons or ports.
Measure your materials to fit the back of your phone, leaving a small margin around the edges to avoid covering the camera lens or interfering with case edges. For paper or photos, cut slightly smaller than the phone back so they won’t crinkle when you snap the case on. If you’re using multiple elements like flowers or washi tape pieces, arrange them on your phone first to plan your design before committing.
- Clean your phone’s back surface thoroughly with a microfiber cloth to remove fingerprints, dust, and oils that could show through the clear case.
- Position your decorative materials directly on the phone’s back, making final adjustments to your layout and ensuring nothing obstructs the camera.
- Carefully snap the clear case over your phone, starting at one corner and working around to avoid shifting your design.
- Press gently but firmly around all edges to ensure the case is fully seated and your materials are held in place.
- Check that all buttons and ports are accessible and that your design looks even from all angles.
For extra security, particularly with loose elements like pressed flowers, some crafters add a tiny dot of clear-drying craft glue to anchor materials to the phone before adding the case. Just use it sparingly, you want to be able to remove your design later without residue. If your design includes multiple layers or you notice slight shifting, double-sided tape cut to size works well as a stabilizer between paper elements.
The finished case should feel secure with no rattling or movement of your decorative materials inside. This technique gives you the freedom to swap designs whenever you want something fresh, just pop off the case, update your materials, and snap it back on.
Method 2: Fabric-Covered Phone Case
Fabric-covered phone cases bring textile arts into everyday accessories, transforming plain cases into personalized statements that showcase your favorite prints, textures, and colors. This technique works beautifully with cotton quilting fabrics, vintage textiles, or even upcycled clothing scraps that hold sentimental value.
Start by selecting a hard plastic or silicone case that fits your phone snugly. Avoid cases with heavily textured surfaces, as fabric adheres best to smooth finishes. Your fabric choice matters, thin to medium-weight cotton works best for beginners. Avoid thick upholstery fabrics or stretchy knits, which create bulk and don’t conform well to corners.
Decoupage medium like Mod Podge provides the easiest application method, acting as both adhesive and sealant. Alternatively, fabric glue or spray adhesive creates a permanent bond. Each has trade-offs: decoupage medium allows repositioning but requires multiple coats, while fabric glue sets quickly but demands precision on the first try.
- Remove the phone from the case and clean the case thoroughly with rubbing alcohol to remove oils and residue.
- Trace the case outline onto your fabric, adding approximately one inch of extra material on all sides for wrapping around edges.
- Cut the fabric carefully with sharp scissors, keeping the edges clean to prevent fraying.
- Apply your chosen adhesive to the case back in a thin, even layer, working in sections to prevent premature drying.
- Center the fabric over the case and smooth outward from the middle, pressing firmly to eliminate air bubbles and wrinkles.
- Wrap excess fabric around the edges to the inside of the case, clipping corners at a 45-degree angle to reduce bulk and create crisp edges.
- Apply additional adhesive to secure wrapped edges, holding each section until it sets.
- Allow the case to dry completely, then seal the fabric with two to three thin coats of decoupage medium or clear acrylic sealer for water resistance and durability.
The corners require patience, they’re where beginners often struggle. Cut small notches in the fabric at corner points rather than trying to fold thick layers. This creates flat, professional-looking corners that won’t peel. Allow at least 24 hours of drying time before inserting your phone, as premature use can shift the fabric or create impressions in uncured adhesive.
Method 3: Resin-Coated Artistic Case
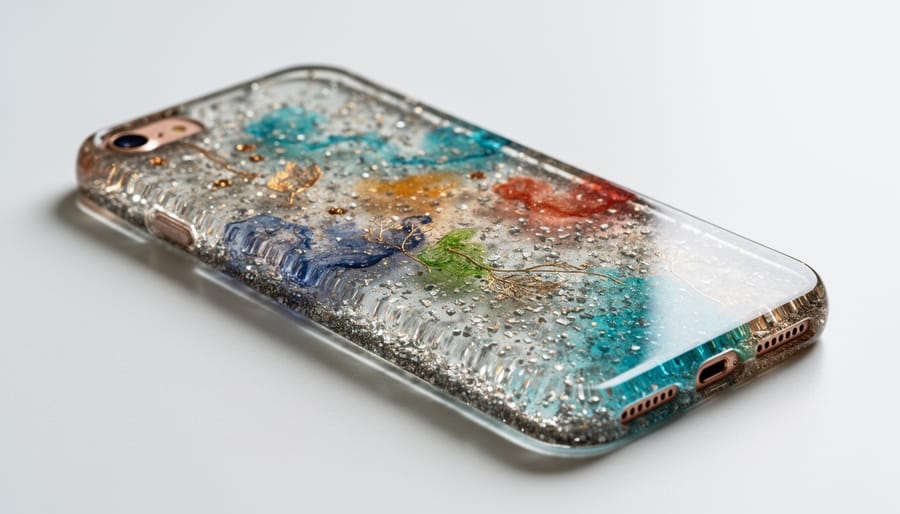
Resin-coated phone cases deliver a professional, gallery-quality finish that protects embedded artwork beneath a glass-like surface. This technique requires patience and precision, but the results rival anything you’d find in boutique shops.
Start by selecting a two-part epoxy resin formulated for crafts, avoid construction-grade products. You’ll mix equal parts resin and hardener in a disposable cup, stirring slowly for two minutes to prevent air bubbles. Work in a dust-free space at room temperature between 70-75°F, as cold slows curing while heat accelerates it unpredictably.
Prepare your base case by roughening the surface lightly with fine sandpaper, which helps resin adhere. Arrange your decorative elements, dried flowers, glitter, small charms, metallic leaf, or alcohol ink swirls, on the case before adding resin. Once resin touches these materials, repositioning becomes nearly impossible.
The resin application process follows a specific sequence with careful timing:
- Pour a thin base layer of mixed resin over your decorated case, using a craft stick to spread it evenly to the edges, this anchors loose elements (5 minutes work time)
- Use a heat gun or butane torch in quick passes 6 inches above the surface to pop any surface bubbles (1 minute)
- Let this layer cure for 3-4 hours until tacky but not fully hardened
- Mix a second batch and pour a flood coat for the glossy dome effect, allowing resin to self-level (3 minutes)
- Remove any new bubbles with the heat source, then tent the case with a box to protect from dust
- Allow 24-48 hours for complete curing in an undisturbed location
During curing, check after thirty minutes for drips forming on the case edges. Wipe these away with a stick before they harden. Resin remains workable for about twenty minutes after mixing, so plan your design completely before you begin.
The finished case will feel rock-hard when fully cured. If it remains slightly tacky after forty-eight hours, it was likely mixed incorrectly or exposed to cold temperatures, unfortunately, you’ll need to start fresh. Properly cured resin cases withstand daily wear for years without yellowing if you use UV-resistant resin formulas.
Method 4: Paint and Sealant Technique
Painting directly on a phone case lets you create intricate artwork that’s entirely your own, from minimalist geometric patterns to detailed illustrations. This technique works brilliantly on hard plastic or silicone cases and gives you complete creative freedom without expensive equipment.
Start by roughing up your case’s surface with fine-grit sandpaper (220-grit works well). This creates tiny scratches that help paint adhere properly. Wipe away all dust with rubbing alcohol on a microfiber cloth and let it dry completely, any residue will cause your design to peel later.
For design transfer, sketch your concept on paper first, then trace it onto the case using a light pencil or white gel pen. You can also print designs and use graphite transfer paper, though freehand painting with paint pens gives the most spontaneous, artistic results.
- Apply a base coat of acrylic paint or spray primer if you want full coverage, letting it dry 30 minutes between coats.
- Build your design in thin layers, allowing each layer to dry 15-20 minutes before adding details on top.
- Let the completed artwork cure overnight in a dust-free spot before sealing.
- Apply 2-3 thin coats of clear acrylic sealer or Mod Podge, drying 1-2 hours between applications.
- Allow the sealed case to cure for 48 hours before use to ensure maximum durability.
Nail polish creates beautiful marbled effects when you swirl colors together, while paint pens offer precision for lettering and fine details. Whatever medium you choose, resist the urge to apply thick coats, multiple thin layers always outlast one heavy application and won’t crack when the case flexes.
Testing Your Finished Case and Next Steps
Before you slip your brand-new phone case into daily use, give it the thorough testing it deserves. This verification process ensures your hard work won’t be undone by a premature installation, and it helps you spot any issues while they’re still easy to fix.
Start with the cure test. If you’ve used resin, paint, or sealant, your case needs adequate curing time even if it feels dry to the touch. Gently press a clean fingernail against an inconspicuous area, if it leaves an indent or feels tacky, give it another 24 hours. Resin cases typically need 48-72 hours in a dust-free environment before they’re truly ready. For fabric or decoupage cases, check that all edges are firmly adhered with no lifting corners.
Once you’re confident the materials have set, test the fit. Place your phone into the case slowly, checking that it slides in without forcing. Remove it and inspect for any scratches or marks on your phone’s surface, if you see any, there might be rough edges or loose decorative elements inside the case that need smoothing. Press all buttons through the case openings to ensure they click properly and aren’t obstructed. Plug in your charging cable and any headphones to verify the ports align correctly.
Examine the finish quality under good lighting. Look for air bubbles in resin, uneven paint coverage, or gaps in fabric edges. Small imperfections add character, but anything that compromises protection should be addressed. Check the interior for loose glitter, beads, or other elements that could scratch your phone screen.
Common issues have straightforward fixes. Peeling edges usually respond well to a thin layer of additional adhesive applied with a toothpick, then weighted overnight. Sticky surfaces that won’t cure often mean incompatible materials or insufficient mixing, these cases may need stripping and redoing. Misaligned elements can sometimes be gently repositioned if the adhesive hasn’t fully set.
Share your creation with fellow crafters online. The handmade phone case community loves seeing new techniques and creative approaches. Post photos to crafting forums, Instagram with relevant hashtags, or Facebook groups dedicated to DIY accessories. You’ll often receive valuable feedback, discover new methods, and connect with others who share your passion for functional art. Don’t hesitate to document what worked and what you’d change next time, this reflection helps you refine your signature style and builds confidence for your next project.
Taking Your Phone Case Crafting Further
Once you’ve mastered the basic techniques, you’ll likely find yourself dreaming up new combinations and variations. That’s when phone case crafting transforms from following tutorials into genuine artistic expression. Try merging methods, perhaps a resin coating over pressed flowers, or fabric backing paired with hand-painted details. Many successful phone case artists develop signature styles that become instantly recognizable, whether that’s a specific color palette, recurring motifs, or a distinctive finishing technique.
The handmade crafts community has embraced phone case makers wholeheartedly. You’ll find dedicated groups on social media where crafters share techniques, troubleshoot challenges, and celebrate each other’s work. These communities often host challenges and swaps that push your skills forward while building connections with fellow artists.
If you’re creating cases that friends constantly ask to buy, you might be sitting on a small business opportunity. Many crafters have turned their phone case hobby into revenue streams through online marketplaces and craft fairs. The relatively low material costs and high perceived value make custom phone cases attractive products for handmade sellers. Before selling, research your local regulations around phone case sales and trademark considerations for any branded elements.
For those ready to level up technically, explore advanced resin techniques like embedding three-dimensional objects, UV resin for faster projects, or alcohol ink designs. Experiment with unusual materials, leather scraps, vintage book pages, even dried food items sealed in resin. Your phone case becomes a tiny canvas for whatever sparks your imagination.
Common Questions About DIY Phone Cases
How long do DIY phone cases last?
With proper sealing and care, most handmade phone cases last 6-12 months of daily use. Resin-coated cases tend to be the most durable, while fabric-covered cases may show wear sooner but are easy to remake or refresh.
Can you wash a handmade phone case?
You can gently wipe most DIY cases with a damp cloth, but avoid submerging them in water. If you’ve sealed your case properly with a waterproof sealant, it’ll handle light moisture, but soaking can still loosen edges or damage embedded materials.
What’s the most durable technique?
Resin-coated cases offer the best durability because the epoxy creates a hard, protective shell over your design. Paint-and-sealant techniques come in second, provided you use a quality acrylic sealer and apply several coats.
How do you prevent yellowing on clear cases?
Choose cases made from TPU rather than standard plastic, as they resist yellowing better. Keep your phone case out of direct sunlight when possible, and apply a UV-resistant clear coat over your design to slow discoloration.
Can you make phone cases to sell legally?
Yes, you can sell handmade phone cases, but be careful not to use copyrighted images, logos, or trademarked characters without permission. Original artwork, patterns you create yourself, and licensed designs are all fair game.
Where to buy bulk supplies for crafting multiple cases?
Online wholesalers and craft supply sites offer blank cases in bulk at lower per-unit costs. Check AliExpress, Amazon Business, or specialty craft wholesalers for quantities of 10 or more, which work well if you’re testing designs or building inventory to sell.
Beyond these common questions, crafters often wonder about color-fastness, especially when using markers or food coloring in resin. The key is always sealing. Even the prettiest design won’t hold up if moisture or oils from your hands can seep in. Test your sealing method on a practice case before committing to your favorite design.
Another practical concern is customization for different phone models. Once you’ve mastered a technique, you can apply it to any blank case that fits your device. Just remember to verify button cutouts and camera openings match your specific phone model before you start decorating. Nothing’s more frustrating than finishing a gorgeous case only to realize the volume buttons don’t line up.
If you’re making cases as gifts, consider the recipient’s lifestyle. Someone who’s rough on their belongings will appreciate a resin case over a delicate pressed-flower design. Match the technique to how the case will actually be used, and you’ll create something they’ll treasure and actually keep on their phone.
Creating your own phone case transforms an everyday object into something that tells your story. Whether you chose pressed flowers, bold paint strokes, swirling resin, or vintage fabric, you’ve made something no one else in the world has, and that matters.
Your finished case isn’t just protection for your device. It’s wearable art that travels with you, sparks conversations, and reminds you throughout the day that you made this. That sense of pride doesn’t fade after the first week. If anything, it grows stronger each time someone asks, “Where did you get that?”
Don’t keep your creation to yourself. Share photos with the crafting community, whether that’s online or with friends who might want to try their own designs. Your first attempt might inspire someone else’s first step into handmade crafts. And if you’re already thinking about technique combinations or your next design, you’re experiencing what makes this craft so addictive, there’s always another color palette to explore, another material to try, another way to push your creative boundaries.
The best part? You already know how. Now go make something beautiful.