
How to Store and Care for Your Craft Supplies to Keep Them in Perfect Condition
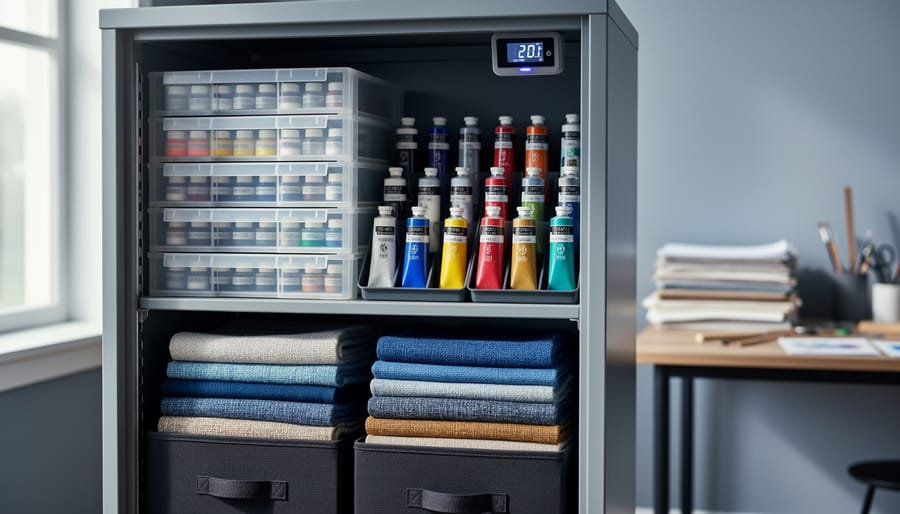
Protecting your craft supplies from damage starts with three essentials: climate-controlled storage, proper containers, and a regular maintenance routine. Whether you’ve invested hundreds in premium watercolors or you’re just building your first collection of paper and glue, how you store craft supplies determines whether they’ll last six months or sixteen years. Most crafters lose materials not to dramatic accidents but to slow deterioration from humidity, direct sunlight, and poor air circulation.
Think about Sarah, a quilter from Vancouver who watched her hand-dyed fabric collection fade to pastel versions of their former selves after two years on open shelves near a window. Or Marco, who discovered his acrylic paints had separated into unusable chunks because he stored them in an unheated garage through three winters. These aren’t rare horror stories. They’re common outcomes of storage decisions most of us make without thinking.
The good news? Proper craft supply care doesn’t require a dedicated studio or expensive equipment. It does require understanding what damages different materials and building simple habits around organization and inspection. Paper products need humidity below sixty percent. Paints need consistent temperatures. Fabrics demand darkness and air flow. Once you match your storage method to your materials’ specific needs, preservation becomes automatic. Just as you would maintain proper ventilation through dryer vent repair in your home, maintaining climate control for your craft supplies protects them from deterioration.
This guide walks you through setting up a storage system that protects your investment, keeps your workspace functional, and ensures your supplies are ready when inspiration strikes.
Essential Storage Tools and Materials You’ll Need
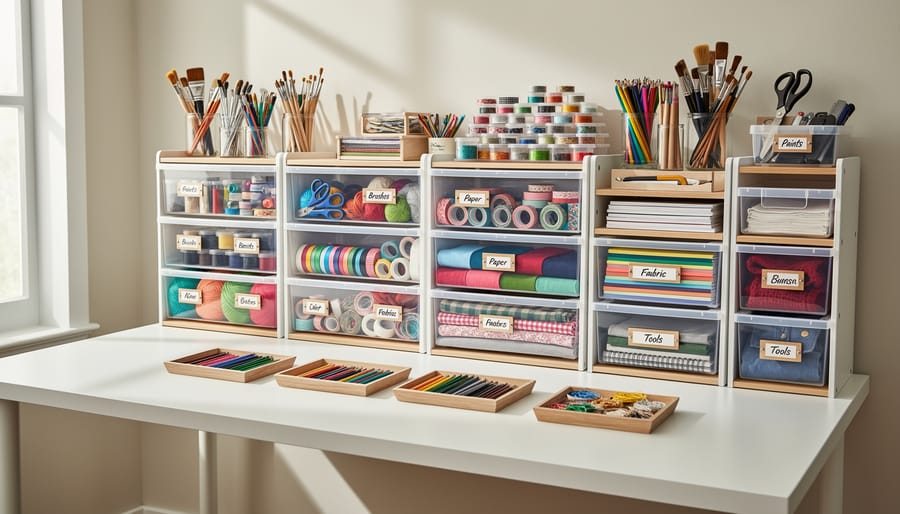
Your craft supplies represent a significant investment, both financially and creatively. Choosing the right storage tools protects that investment and makes your workspace more functional. The good news? You don’t need expensive specialty systems. Many effective storage solutions adapt from basic organizational tools you probably already use elsewhere in your home.
Start with airtight containers for materials vulnerable to moisture and air exposure. Clear plastic bins with secure lids work well for beads, buttons, and small embellishments because you can see what’s inside without opening them. For paints, inks, and liquid media, look for containers that seal completely and can be stored upright without leaking. Glass jars with rubber gaskets offer excellent protection for items like glitter or fine powders that might escape cheaper containers.
Paper crafters need acid-free storage boxes to prevent yellowing and deterioration over time. Regular cardboard boxes contain acids that gradually damage paper, cardstock, and photographs. Archival-quality boxes cost more upfront but preserve your materials for years. Flat file systems work beautifully for storing large sheets without bending or creasing them.
Essential items you’ll want on hand include:
- Airtight containers in various sizes for moisture-sensitive materials
- Acid-free boxes and tissue paper for paper goods and finished projects
- Drawer organizers and dividers for sorting small items by type or color
- Hygrometer to monitor humidity levels in your storage area
- Silica gel packets or dehumidifier containers for moisture control
- UV-protective bins or opaque containers for light-sensitive supplies
- Quality labels, permanent markers, and inventory tracking tools
For fabric and yarn storage, breathable cotton bags or pillowcases prevent musty odors while protecting against dust. Avoid plastic bags for natural fibers because trapped moisture encourages mildew. Cedar blocks or lavender sachets deter moths without the harsh chemicals found in mothballs.
When selecting any storage container, check that it’s the right size. Overstuffed containers stress materials and make retrieval frustrating. Too-large containers waste space and let items shift around, potentially causing damage. Measure your supplies first, then choose containers that accommodate them with a bit of breathing room.
Safety Warnings and Common Storage Mistakes to Avoid
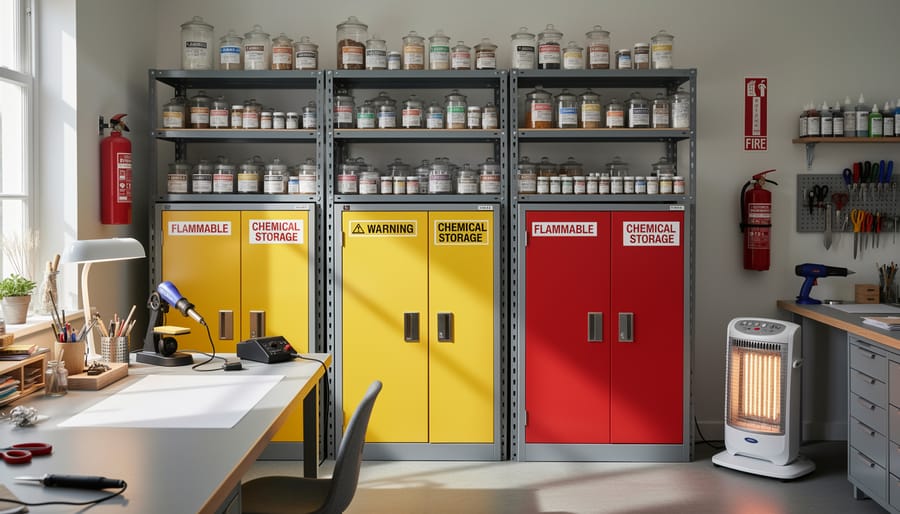
Before you start storing supplies, understand that your creative materials can pose real hazards when kept improperly. A watercolorist in Vermont learned this the hard way when a winter freeze ruptured several bottles of acrylic medium stored in her unheated garage, creating a sticky mess that damaged nearby fabric stashes and required hours of cleanup.
Keep all aerosol cans away from direct sunlight and temperatures above 120°F, as pressure buildup can cause explosions. Solvent-based products need proper ventilation even when stored; a closed cabinet in a stuffy craft room concentrates fumes that become toxic over time. If you smell chemical odors when you open your storage area, your ventilation isn’t adequate.
Storing sharp tools, rotary cutters, craft knives, scissors with exposed blades, within children’s reach creates obvious dangers. Even if you don’t have kids at home, guests with children visit, and a curious toddler can open unlocked drawers. Use childproof latches on lower cabinets containing anything sharp or toxic.
Don’t stack heavy containers overhead unless they’re secured. A 35-pound bin of clay or plaster falling from a top shelf can cause serious injury. Place heavier items at waist level or below, and if you must use high shelving, choose lightweight materials for those spots.
Moisture damage ruins more supplies than almost any other factor. Cardboard boxes on concrete floors wick up dampness, turning paper and fabric into mildewed disasters within weeks. Elevate everything at least six inches off the floor, especially in basements or garages where humidity fluctuates.
Never store food-safe containers alongside toxic craft materials. Paint residue or dye contamination can transfer to items you later use in your kitchen, creating poisoning risks. Similarly, don’t mix incompatible chemicals, certain paints react with specific solvents, adhesives can dissolve foam containers, and some metal embellishments corrode when stored with acid-based materials. When in doubt, separate by material type and check manufacturer guidelines for storage compatibility.
Step-by-Step Process for Organizing and Storing Your Craft Supplies
Step 1: Sort and Inventory Your Supplies
Begin by pulling everything out of its current location so you can see what you actually own. Spread supplies across a large table or clean floor space, then group items into broad categories: papers, fabrics, paints, adhesives, tools, embellishments, and notions. Within each category, create subcategories that make sense for your work, separate watercolors from acrylics, cotton fabric from silk, seed beads from glass beads.
As you sort, assess how often you reach for each item. Daily essentials go in one pile, weekly-use supplies in another, and rarely-touched materials in a third. This frequency mapping determines what lives within arm’s reach versus tucked into deeper storage.
Check expiration dates on paints, glues, and any time-sensitive materials. Note which items need special conditions, heat-sensitive glitter, moisture-prone yarns, or light-damaged dyes all have unique storage demands.
Create a simple inventory as you work. A spreadsheet or notebook listing item type, quantity, condition, and eventual storage location becomes your reference guide. Photograph each category before packing it away. This visual record saves time when you’re mid-project and need to locate that specific shade of embroidery floss without dismantling your entire system.
Step 2: Assess and Clean Your Storage Space
Before you bring a single supply into your storage area, check its fitness. Walk in and look for water stains on walls or ceiling, they signal leaks that will ruin paper, rust metal tools, and encourage mold on fabric. Run your hand along baseboards and corners; dampness means you need a dehumidifier before storing anything absorbent.
Check for pest evidence: mouse droppings, spider webs, or small holes in walls. Seal gaps with steel wool and caulk. Moths love dark, undisturbed spaces, so vacuum corners thoroughly and wipe down shelves with vinegar solution to remove dust and insect eggs.
Note temperature swings. Basements that freeze in winter will crack paint bottles and harden adhesives. Attics that bake in summer will melt wax and fade dyes. Aim for stable temps between 60-75°F if possible.
Assess light exposure. Direct sunlight bleaches fabric and paper within weeks. If windows face your storage shelves, add blackout curtains or UV-blocking film.
Wipe everything down, let it dry completely, then assess whether you need climate control tools before proceeding.
Step 3: Match Supplies to Storage Solutions
With your sorted inventory and clean space ready, you can now assign each material type to its optimal container and spot. Start with paper products: store cardstock, scrapbook paper, and specialty sheets in acid-free plastic sleeves or boxes, kept flat in a drawer or on shelves away from direct sunlight. Acid-free materials prevent yellowing and deterioration over time.
Fabrics and yarns need breathable cotton storage bags or bins with ventilation holes rather than sealed plastic, which traps moisture and invites mildew. Keep these containers in a cool, dry closet or under-bed area where air can circulate. Avoid damp basements or hot attics.
Store liquid media, acrylics, inks, watercolors, upright in shallow bins or caddies to prevent leaks. If you paint Mason jars or other glass items, keep those paints in a temperature-stable area between 60-75°F, never in an unheated garage where freezing can ruin the formula. Seal lids tightly after each use.
Adhesives, glues, tapes, epoxies, belong in a climate-controlled space, ideally in a drawer or cabinet near your main work surface. Extreme heat accelerates drying; cold makes some adhesives brittle. Keep applicator tips clean and containers sealed.
Tools go where you can grab them easily. Hang scissors, rulers, and rotary cutters on pegboards or in tool caddies. Store sharp blades in sheaths, and keep cutting mats flat to prevent warping.
Step 4: Label and Document Everything
Creating a labeling system transforms your storage from organized chaos into a functional workspace. Start with waterproof labels on every container, include the contents, purchase date, and color or type if relevant. For paint bottles, note the brand and exact shade name since “teal” means different things to different manufacturers.
Photograph the contents of opaque bins before sealing them. Store these photos in a dedicated folder on your phone, named by storage location. When you’re mid-project and need that specific ribbon, you’ll know exactly which box to open without unpacking five others.
A simple spreadsheet works brilliantly as a master inventory. List each item, quantity, storage location, and purchase date. Update it when you buy supplies or finish a project. This prevents duplicate purchases and helps you track what’s actually getting used versus what’s collecting dust.
For materials with expiration dates, adhesives, paints, certain dyes, add reminder alerts to check them quarterly. Creating reference cards for complex materials, like specialty papers with specific care requirements, saves you from googling the same information repeatedly. Your future self will thank you when inspiration strikes at midnight.
Step 5: Establish Access and Workflow Zones
Now that your supplies are labeled and documented, arrange them based on how you actually work. Start by identifying your everyday tools, the scissors, tape, and adhesives you reach for constantly, and give them prime real estate on your desktop or within arm’s reach of your main work surface. These frequently-used items shouldn’t require you to stand, dig, or move other containers.
Create dedicated project workflow zones by grouping supplies for specific crafts together. If you primarily make greeting cards, keep cardstock, stamps, ink pads, and embellishments in one accessible area rather than scattered across different storage systems. This clustering reduces setup time and keeps you in creative flow instead of hunting for materials.
Store bulk supplies, extra paint bottles, backup paper packs, wholesale bead containers, in less accessible spots like higher shelves, deeper drawers, or separate closets. You’ll restock your primary work area from these reserves as needed, keeping your active workspace uncluttered while maintaining inventory depth.
Build project-specific kits in portable containers for crafts you work on regularly. A watercolor kit with brushes, palette, and favorite colors stays ready to grab, while embroidery supplies travel together in their own case. This approach transforms preparation from a chore into simply selecting the right kit and starting work immediately.
Step 6: Set Up Maintenance Routines
A storage system only works if you maintain it. Without regular check-ins, even the most organized craft space will gradually slide into chaos as new supplies arrive, projects change, and materials age.
Set up a simple maintenance schedule based on your crafting frequency:
- Monthly quick scan: Walk through your storage areas and look for obvious problems, containers left open, supplies in wrong spots, or signs of moisture.
- Quarterly deep check: Pull out each storage container, verify contents against your inventory, and look for early damage like rust, mold spots, or dried-out materials.
- Biannual rotation: Move older supplies forward so you use them before they expire, and refresh protective materials like anti-tarnish strips or moisture absorbers.
- Annual reorganization: Reassess your entire system. Has your craft focus shifted? Do you need different containers? Purge dried paints, brittle elastic, and supplies you realistically won’t use.
- After major purchases: Update your inventory immediately and find proper homes for new items rather than creating temporary piles.
- Post-project cleanup: Return supplies to their designated spots while you still remember where everything goes, not weeks later.
Track maintenance dates in your calendar or planner alongside other household tasks. You might spot a slowly leaking paint tube in month two instead of discovering a sticky mess in month six. Regular attention prevents small problems from becoming expensive disasters and keeps your creative momentum strong.
Caring for Specific Types of Craft Supplies
Fabric, Yarn, and Fiber Arts Materials
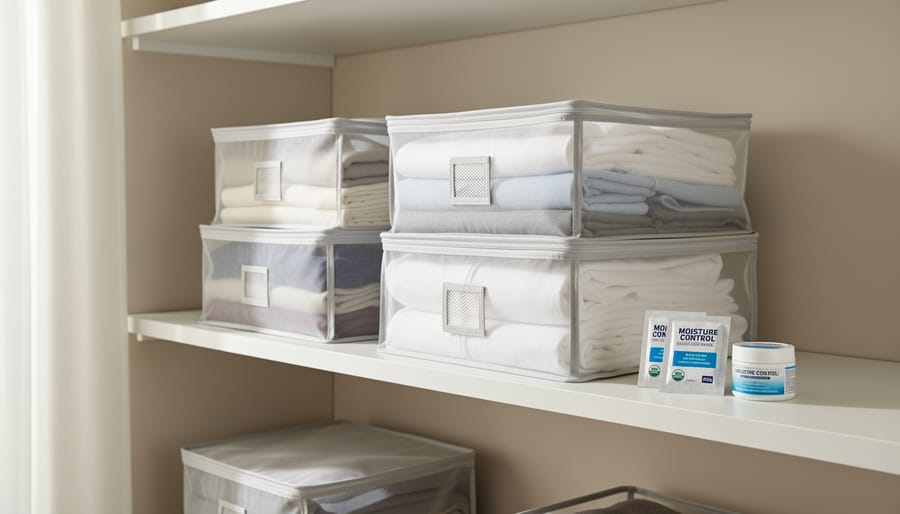
Natural fibers like wool, cotton, and silk need air circulation to prevent mildew, so skip sealed plastic bins. Instead, use cotton storage bags, breathable fabric boxes, or even clean pillowcases for long-term storage. Cedar blocks or lavender sachets tucked into containers naturally repel moths without the chemical smell of mothballs. For comprehensive yarn storage tips store skeins upright in open baskets or clear bins with ventilation holes, keeping them away from direct sunlight that bleaches vibrant dyes. Check your stash every few months for signs of insect damage, tiny holes or webbing, and immediately isolate any affected pieces. Store your most-used fibers in a cool, dry closet rather than a damp basement or hot attic where temperature swings accelerate deterioration.
Paints, Inks, and Liquid Media
Liquid craft media demands attention to temperature and air exposure. Store paints and inks upright in a cool, dry location between 60-75°F, freezing ruins acrylics permanently, while excessive heat accelerates separation in oil-based products. After each use, wipe bottle rims clean before sealing to prevent air gaps that dry out contents. Check lids monthly and tighten any that feel loose.
Most acrylics last 2-3 years when properly sealed, while oils can survive a decade if stored correctly. Write purchase dates on bottle bottoms to track age. If paint separates, stir thoroughly rather than shaking, which introduces air bubbles. Discard anything with mold, severe separation that won’t remix, or an off smell. Keep opened bottles toward the front of your storage area so you use older supplies first, reducing waste from expired media.
Paper, Cardstock, and Specialty Papers
Paper deteriorates when exposed to acid, humidity above 50%, and inconsistent storage that bends or crushes the sheets. Store your paper flat in acid-free boxes or portfolios, keeping different weights and finishes separated, lightweight vellum bruises easily when stacked with heavy cardstock. Acid-free storage prevents yellowing and extends paper life by decades, making it worth the investment for specialty and handmade papers. Vertical filing works well for frequently-used sheets you need to browse quickly, but only if dividers support each piece without slumping. Place silica gel packets in storage containers if your craft space runs damp, and keep papers away from direct sunlight and heat vents that cause warping and color fade.
Adhesives, Tapes, and Bonding Agents
Adhesives lose their bonding strength when exposed to temperature extremes. Store glue bottles, tape rolls, and epoxy sets in a climate-controlled space between 60-75°F, away from direct sunlight and heating vents. Keep adhesive caps tightly sealed after each use to prevent air exposure that causes drying and skin formation. Wipe bottle tips and tape dispensers clean immediately, dried residue attracts dust and compromises future applications. Store liquid glues upright to prevent leakage and separation. Spray adhesives require upright storage in well-ventilated areas away from heat sources due to their flammable propellants.
Small Items: Beads, Buttons, and Embellishments
Small beads and embellishments disappear faster than anything else in a craft room. Store them in clear containers with screw-top lids or individual compartments, tackle boxes and bead organizers with adjustable dividers work beautifully. For metal findings and vintage buttons prone to tarnish, tuck anti-tarnish strips into each compartment or use small ziplock bags. Label everything, even tiny containers, because memory fails when you need that specific shade of seed bead. Stack similar items vertically in shallow drawers so you can see your entire collection at a glance without digging through layers.
Verification and Maintaining Your Storage System

A well-designed storage system only works if you actively monitor it. Set a quarterly review date, perhaps at the start of each season, to walk through your supplies and check for problems before they become expensive losses.
Start each audit by looking for visible damage indicators. Fabrics and papers should show no discoloration, yellowing, or water stains. Paints and inks should pour smoothly without separation or chunks. Adhesives should remain tacky rather than dried out or excessively runny. Open a few containers and smell for mustiness, which signals moisture problems, or chemical odors that suggest deteriorating materials. Check that small items like beads and buttons haven’t tarnished and that thread still has its sheen.
Run your hands along fabrics to confirm they remain soft and flexible, not brittle. Squeeze paint tubes gently to verify the contents haven’t hardened. Pull out drawers and bins to ensure nothing has shifted, spilled, or gotten buried where you can’t reach it. Your system should still reflect your current workflow, if you’re digging past five containers to reach supplies you use weekly, it’s time to rearrange.
Look for pest evidence like tiny holes in fabric, powder around wood items, or webbing in yarn. Inspect silica gel packets and replace any that have changed color, indicating they’ve absorbed maximum moisture. Rotate your stock, moving older supplies forward and checking expiration dates on adhesives and mediums.
Update your inventory to reflect completed projects and new purchases. If you find yourself constantly reorganizing the same problem area, that’s your system telling you it needs a different solution. A ceramicist I know discovered during her spring audit that her glaze bottles had developed separation because her storage shelf was too close to a heat vent, a simple move solved months of frustration. These regular check-ins catch small issues before they destroy your materials and help your storage system grow with your creative practice.
Frequently Asked Questions About Craft Supply Storage
What temperature and humidity levels are best for craft supply storage?
Most craft supplies stay in good condition between 65-75°F with 40-50% relative humidity. Avoid basements prone to dampness and attics with extreme temperature swings, as both can warp paper, rust metal findings, and encourage mold growth on natural fibers.
How can I store supplies on a budget without buying expensive containers?
Repurpose glass jars, shoe boxes, and food containers you already own. Clear plastic produce containers work beautifully for beads and buttons, while cardboard magazine holders organize paper and fabric scraps at no cost.
Can I rescue paints or markers that have started to dry out?
For acrylic paints, add distilled water drop by drop and mix thoroughly, this works if they’re tacky but not fully hardened. Dried-out markers sometimes revive by standing them tip-down in a small amount of rubbing alcohol for a few hours, though results vary by brand and age.
How often should I reorganize my craft supply storage?
Do a quick inventory and tidy-up every three months to catch early signs of damage and return items to their proper places. Plan a deeper reorganization annually or whenever you notice your current system making it harder rather than easier to find what you need.
These questions come up repeatedly in crafting communities because supply care directly affects the quality of your finished work. When you protect your investment in materials through proper storage, you’re ensuring that every project starts with supplies in their best condition rather than working around dried-out adhesives or discolored papers.
Small-space crafters often wonder if they need to sacrifice their hobby when moving to a smaller home. The answer is no, but it does require vertical thinking. Wall-mounted pegboards, over-door organizers, and stackable clear bins maximize limited square footage while keeping supplies visible and accessible. Use the space under your bed for flat storage of paper goods and fabrics in slim, wheeled containers that slide out easily.
For apartment dwellers concerned about climate control, keep supplies away from exterior walls that experience temperature fluctuations. A bedroom closet typically offers more stable conditions than a storage unit, and the investment in a small dehumidifier pays off if you live in a humid climate. Even basic attention to placement, away from heating vents, out of direct sunlight, off cold concrete floors, makes a measurable difference in how long your supplies stay fresh and usable.
Proper storage isn’t just about keeping supplies neat. It’s an investment in your creative future and a commitment to sustainability. Every time you prevent a tube of paint from drying out or protect fabric from moths, you’re saving money and reducing waste. The organizational principles you’ve learned here apply throughout your home, whether you’re maintaining tools, protecting seasonal items, or caring for kitchen appliances, the same planning and respect for your belongings creates lasting value.
Ceramicist Maria Chen discovered this firsthand when she finally organized her chaotic studio. After years of replacing dried-out underglazes and searching through unlabeled containers, she spent one weekend implementing a labeled, climate-controlled system. Six months later, she’d saved enough on replacement supplies to fund a kiln upgrade. More importantly, her creative flow improved dramatically. “I stopped avoiding certain techniques because I couldn’t find the materials,” she says. “My studio became a place that supported my work instead of fighting against it.”
You don’t need to transform your entire space overnight. Start with one category that frustrates you most, perhaps those tangled embroidery threads or that box of dried-up markers. Apply what you’ve learned, then move to the next category. Each small improvement compounds over time, creating a workspace that nurtures your creativity rather than draining it. Your supplies are the tools of your passion. They deserve care that honors both their value and yours.